A role is a saved bundle of permissions that decides what a person can see and do in Clean Smarts. Those same permissions control both the web portal and what your team sees in the mobile app, so the role you assign is also how you shape the mobile experience for each cleaner, manager, or customer.
Clean Smarts comes with four default roles: Admin, Manager, Cleaner, and Customer. When those don't fit, you can build your own custom role once and reuse it for every employee who needs that same access.
How Roles and Modules Work
A role is made up of modules. Each module is a single capability, such as checking in from a phone, completing checklists, editing schedules, or messaging customers. Turn a module on for a role and everyone with that role gets that capability.
Two things are worth knowing before you start:
- Modules apply across the apps. A single module often controls a web feature and a mobile feature at the same time. For example, the check-in module is what makes the clock-in button appear on a cleaner's phone.
- Location access still applies. Most modules only let a person act on the locations they're assigned to. The exception is Manage Account, which grants account-wide access and exposes all users and locations regardless of location assignments. Treat it as your administrator-level switch.
If you want the full module-by-module breakdown, see What does each of the user modules do?
The Default Roles
Most teams can run on the four built-in roles. Here's how they map to real people:
|
Role |
Best for |
What it means on mobile |
|---|---|---|
|
Admin |
Owners and office administrators |
Full account access, including all users, all locations, and company settings. |
|
Manager |
Supervisors and inspectors |
Schedule, time, checklists, inspections, and messaging for their assigned locations. |
|
Cleaner |
Front-line mobile staff |
Clock in and out, complete checklists and tasks, report issues, request supplies, and view their own schedule. |
|
Customer |
Client contacts |
A read-only view of inspections plus customer messaging. No time or scheduling tools. |
You can't edit the default roles directly. If one is close but not quite right, build a custom role from it (covered below) instead of trying to change the original.
Open the User Roles Page
- Click your profile in the bottom-left corner and choose Company Settings. You can also press Ctrl+K (or Cmd+K on a Mac) and search for "User Roles".
- Select User Roles from the settings menu.
You'll land on a permissions grid. Each role is a column, each module is a row, and a check mark means that role includes that module. Use the search box to jump to a specific module when the list gets long.

Create a Custom Role
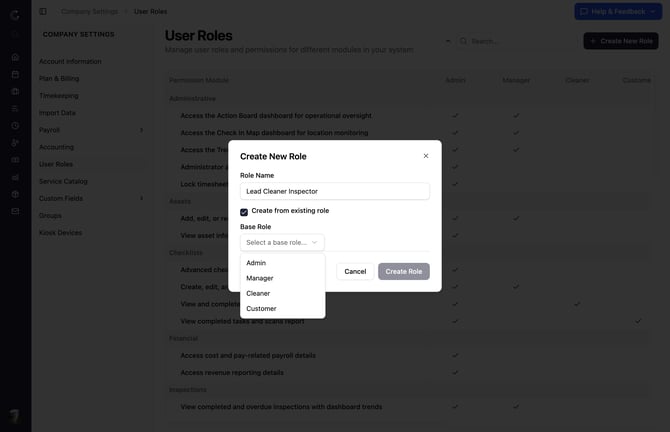
Say you want a "Lead Cleaner Inspector" who does everything a cleaner does but can also review completed inspections and message customers. That's a custom role.
- Click Create New Role in the top-right corner.
- Enter a name that describes the job, like "Lead Cleaner Inspector". This is the name you'll pick later when assigning the role to people.
- (Optional) Check Create from existing role and choose a default role as a starting point. Starting from Cleaner pre-fills the standard cleaner modules so you only have to add what's extra.
- Click Create Role.
Your new role appears as its own column in the grid. Now fine-tune it: check or uncheck modules in that column to add or remove access. Each change saves on its own, so there's no separate save button to hunt for. A role has to keep at least one module, so you can't clear them all.
Edit or Remove a Role
- To change a custom role, return to Company Settings > User Roles and toggle modules in that role's column. Every employee assigned to the role picks up the change automatically.
- To delete a custom role, use the remove option on that role's column and confirm. Reassign anyone still using it first so they don't lose access unexpectedly.
Because edits ripple out to everyone with the role, change roles when you want a policy to apply to a group. When you only need to tweak one person, use custom permissions instead.
Assign a Role to a User
- Go to Manage Users and open the person's profile.
- On the Personal Information page, find the User Role dropdown.
- Pick the role you want, including any custom role you created.
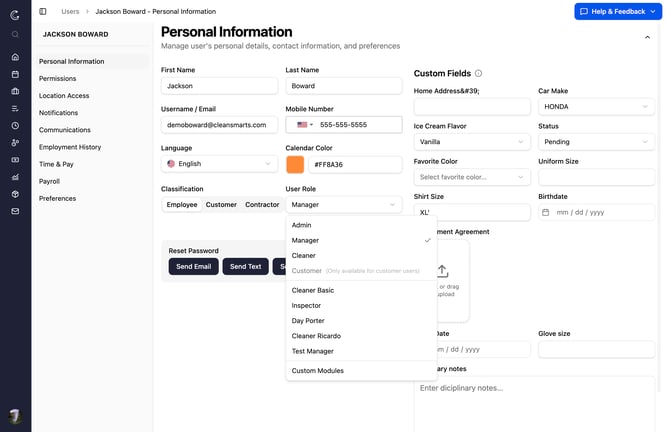
- Click Save Changes.
The next time that person opens the web portal or the mobile app, they'll see exactly the features their role allows.
Give One User Custom Permissions
Sometimes one person needs a small exception, like a single cleaner who should also approve supply requests. You don't need a whole new role for that.
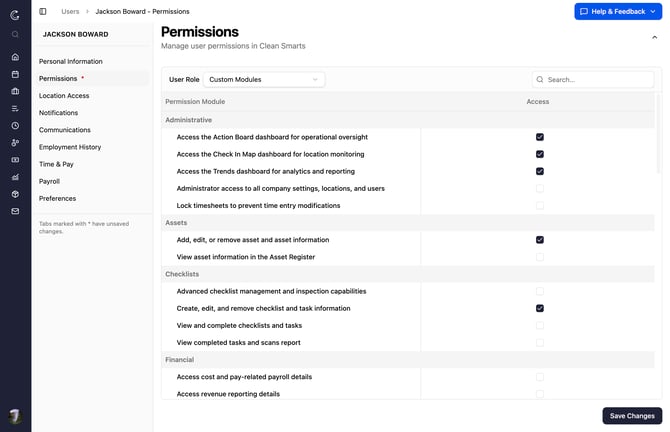
- Open the user's profile and click Customize permissions under the User Role dropdown. (Save the user first if it's a brand-new profile.)
- Choose a role to start from, then turn on the option to use custom modules for this user.
- Add or remove individual modules for that person only.
- Save.
Custom permissions affect just that user. Everyone else on the role they started from stays the same.
Modules That Shape the Mobile Experience
When you're building a role for field staff, these are the modules that change day-to-day life on the phone. Match them to what the job actually requires:
- Timetracking (Check in) — Shows the clock-in and clock-out buttons. Without it, there's no time clock on the phone.
- Locations (Mobile Only) — Adds a check-in button when a cleaner taps a location from the List or Map view, so they can clock in to sites they're not formally scheduled for.
- Group Check-In — Lets a crew lead clock teammates in and out from the shift details screen.
- Checklist (Cleaner) — Lets a person view and complete checklists and tasks. This is the core of the cleaner's mobile workflow.
- Schedule (Cleaner View) — Shows a worker their own schedule and sends late-for-shift reminders.
- Issue (Cleaner) — Lets staff report and edit issues from the field, including customer-reported ones assigned to them.
- Supplies (Request) — Lets staff request, close, and fulfill supplies from the location.
- Messaging (Cleaner) — Opens internal team chat on the phone. Add Messaging (Customer) only when a person should talk to clients directly.
- Inspections (Cleaner) — Lets staff view completed inspections and get notified when one is done.
A good rule of thumb: start every field role from Cleaner, then add only the modules the job needs. It keeps the phone app focused and avoids handing out account-wide access by accident.
Tips for Rolling Out Roles
- Name roles after the job, not the person. "Lead Cleaner Inspector" ages better than "Maria's access".
- Build from the closest default role. Starting from Cleaner or Manager is faster and less error-prone than building from an empty role.
- Reserve Admin and Manage Account for the office. Those grant access to every location and user, which most field roles never need.
- Use custom permissions for one-off exceptions, and roles for group policy. If you find yourself making the same exception three times, turn it into a role.
- Test with a real login. After you assign a role, have someone open the mobile app to confirm they see what you expect.